Note
Access to this page requires authorization. You can try signing in or changing directories.
Access to this page requires authorization. You can try changing directories.
Use the Durable Task Scheduler as a backend for your Durable Functions apps to store orchestration and entity runtime state. In this quickstart, you clone a Hello Cities sample that's already configured to use the Durable Task Scheduler, run it locally with the emulator, and then deploy it to Azure.
- Clone the Hello Cities sample pre-configured for Durable Task Scheduler.
- Set up the Durable Task Scheduler emulator for local development.
- Run the sample and verify orchestration output.
- Deploy your app to Azure and monitor it via the Durable Task Scheduler dashboard.
Prerequisites
Tip
Once the emulator is running, you can access the Durable Task Scheduler dashboard at http://localhost:8082 to monitor orchestrations.
Run the quickstart sample
Install the latest version of the Microsoft.Azure.Functions.Worker.Extensions.DurableTask.AzureManaged package by using the dotnet add package command:
dotnet add package Microsoft.Azure.Functions.Worker.Extensions.DurableTask.AzureManaged --prerelease
Note
The Durable Task Scheduler extension requires Microsoft.Azure.Functions.Worker.Extensions.DurableTask version 1.2.2 or higher.
Build and start the function app:
dotnet build
func start
In host.json, update the extensionBundle property to use version 4.32.0 or later, which includes Durable Task Scheduler support:
{
  "extensionBundle": {
    "id": "Microsoft.Azure.Functions.ExtensionBundle",
    "version": "[4.32.0, 5.0.0)"
  }
}
Start the function app:
func start
Build and start the function app:
mvn clean package
mvn azure-functions:run
In a separate terminal, trigger an orchestration:
$response = Invoke-RestMethod -Method POST -Uri http://localhost:7071/api/DurableFunctionsOrchestrationCSharp1_HttpStart
$response
In a separate terminal, trigger an orchestration:
$response = Invoke-RestMethod -Method POST -Uri http://localhost:7071/api/StartChaining
$response
The response contains status URLs for the orchestration instance. Query the
statusQueryGetUrito check the result:Invoke-RestMethod -Uri $response.statusQueryGetUriWhen the orchestration's
runtimeStatusisCompleted, the output contains greeting results. IfruntimeStatusshowsRunningorPending, wait a moment and query again.View more details about the orchestration instance in the Durable Task Scheduler dashboard at
http://localhost:8082.
Understand the Durable Task Scheduler configuration
The key configuration that makes these samples use the Durable Task Scheduler is in two files.
host.json
The storageProvider section tells Durable Functions to use the Durable Task Scheduler (azureManaged) instead of the default Azure Storage backend:
{
  "extensions": {
    "durableTask": {
      "hubName": "default",
      "storageProvider": {
        "type": "azureManaged",
        "connectionStringName": "DURABLE_TASK_SCHEDULER_CONNECTION_STRING"
      }
    }
  }
}
local.settings.json
The connection string points to the local emulator for development:
{
  "Values": {
    "DURABLE_TASK_SCHEDULER_CONNECTION_STRING": "Endpoint=http://localhost:8080;TaskHub=default;Authentication=None"
  }
}
Note
To migrate an existing Durable Functions app, update these two files and add the appropriate extension package for your language. For .NET, install the Microsoft.Azure.Functions.Worker.Extensions.DurableTask.AzureManaged NuGet package. For other languages, update the extension bundle in host.json to version [4.32.0, 5.0.0).
Run your app in Azure
Create required resources
Create a Durable Task Scheduler instance and Azure Functions app on Azure following the Function app integrated creation flow. This experience will automatically set up identity-based access and configure the required environment variables for the app to access the scheduler.
Navigate to the Function app creation blade.

In the Create Function App (Flex Consumption) blade, fill in the information in the Basics tab.
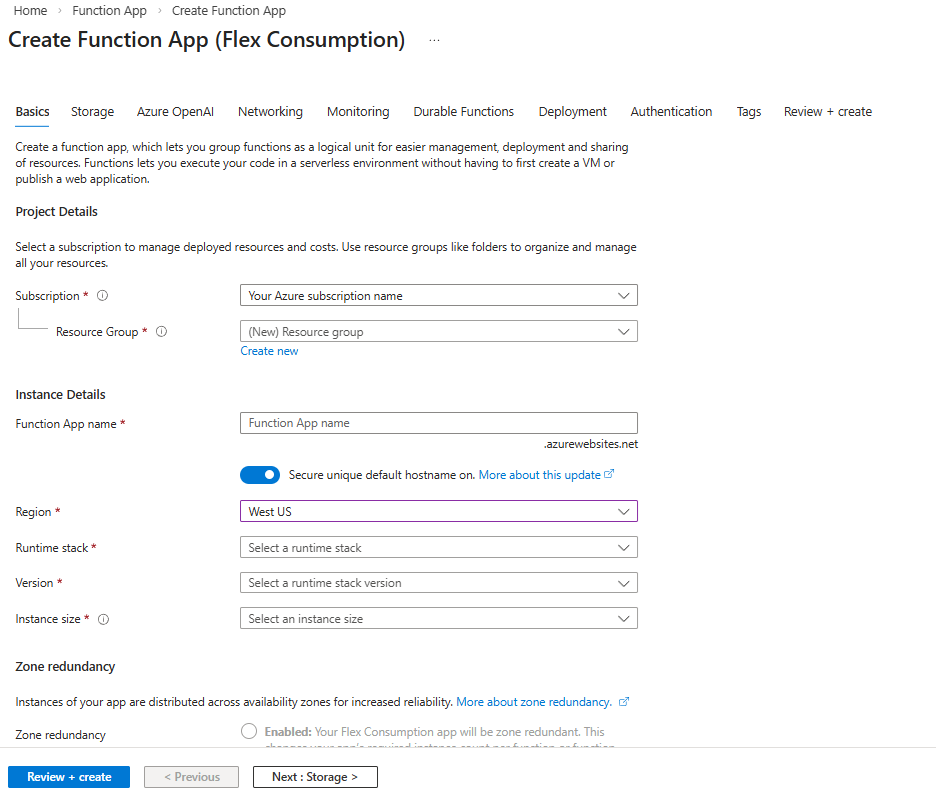
Field Description Subscription Select your Azure subscription. Resource Group Select an existing resource group or click Create new to create a new one. Function App name Create a unique name for your function app. Do you want to deploy code or container image? Keep the Code option selected. Region Select one of the supported regions. Runtime stack Select the runtime you're using for this quickstart. Version Select your runtime stack version. Instance size Select an instance size, or use the default selection. Learn more about instance sizes. Zone Redundancy Leave as the default Disabled setting. Select the Durable Functions tab.
Choose Azure managed: Durable Task Scheduler as the backend provider for your Durable Functions.
Create a scheduler resource. This action automatically creates a task hub.

Field Description Storage backend Select Azure managed: Durable Task Scheduler. Region Make sure the scheduler and function app regions are the same. Durable Task Scheduler Use the scheduler name offered, or click Create new to create a custom name. Plan Select the pricing plan that fits your project best. Check the Choosing an orchestration framework guide to determine which plan is best for production use. Capacity units Only applicable when "Dedicated" pricing plan is selected. You can select up to 3 Capacity Units. Click Review + create to review the resource creation.
A user-assigned managed identity with the required role-based access control (RBAC) permission is created automatically and added to the Function app. You can find in the summary view information related to the managed identity resource, such as:
The role assigned to it (Durable Task Data Contributor)
The assignment scoped to the task hub level

Click Create once validation passes.
Resource deployment could take around 15 to 20 minutes. Once that is finished, you can deploy your app to Azure.
Deploy your function app to Azure
Important
Deploying to an existing function app always overwrites the contents of that app in Azure.
In the command palette, enter and then select Azure Functions: Deploy to Function App.
Select the function app you just created. When prompted about overwriting previous deployments, select Deploy to deploy your function code to the new function app resource.
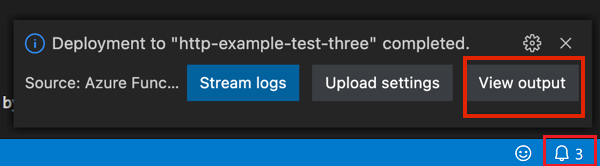
When deployment is completed, select View Output to view the creation and deployment results, including the Azure resources that you created. If you miss the notification, select the bell icon in the lower-right corner to see it again.
Apps on Functions Premium plan
If your app is running on the Functions Premium plan, turn on the Runtime Scale Monitoring setting after deployment to ensure your app autoscales based on load:
az resource update -g <resource_group> -n <function_app_name>/config/web --set properties.functionsRuntimeScaleMonitoringEnabled=1 --resource-type Microsoft.Web/sites
Test your function app
Run the following command to get your function's URL:
az functionapp function list --resource-group <RESOURCE_GROUP_NAME> --name <FUNCTION_APP_NAME> --query '[].{Function:name, URL:invokeUrlTemplate}' --output json
Check orchestration status
Check the status of the orchestration instance and activity details on the Durable Task Scheduler dashboard. Accessing the dashboard requires you to log in.
Note
The following instruction shows a role assignment scoped to a specific task hub. If you need access to all task hubs in a scheduler, perform the assignment on the scheduler level.
Navigate to the Durable Task Scheduler resource on the portal.
Click on a task hub name.
In the left menu, select Access control (IAM).
Click Add to add a role assignment.

Search for and select Durable Task Data Contributor. Click Next.

On the Members tab, for Assign access to, select User, group, or service principal.
For Members, click + Select members.
In the Select members pane, search for your name or email:

Pick your email and click the Select button.
Click Review + assign to finish assigning the role.
Once the role is assigned, click Overview on the left menu of the task hub resource and navigate to the dashboard URL located at the top Essentials section.
Clean up resources
If you no longer need the resources that you created to complete the quickstart, to avoid related costs in your Azure subscription, delete the resource group and all related resources.
Next steps
- Learn more about the Durable Task Scheduler dashboard.
- Troubleshoot any errors you may encounter while using Durable Task Scheduler.